an art tutorial for kids using watercolour and acrylic paint
Birch trees are my favourite trees, and when I first started trying to teach myself to paint with YouTube tutorials birch trees were one of my first choices. I have tried a few methods and wanted to find something that I could use in my art classes, and that I could also use if I’m working with a different grade level this year. Of all the techniques that I looked at, this one is my favourite. It’s easy to do, and most people will have the materials on hand.
To complete this art project you will need:
- paper
- watercolour paints
- scissors
- glue
- a pencil
- a ruler
- black and white paint (acrylic is preferred but tempera would work too)
I made my very first iMovie video tutorial, which I unfortunately filmed vertically… my bad, which you can watch here OR you can scroll paste for a step by step explanation with photos.
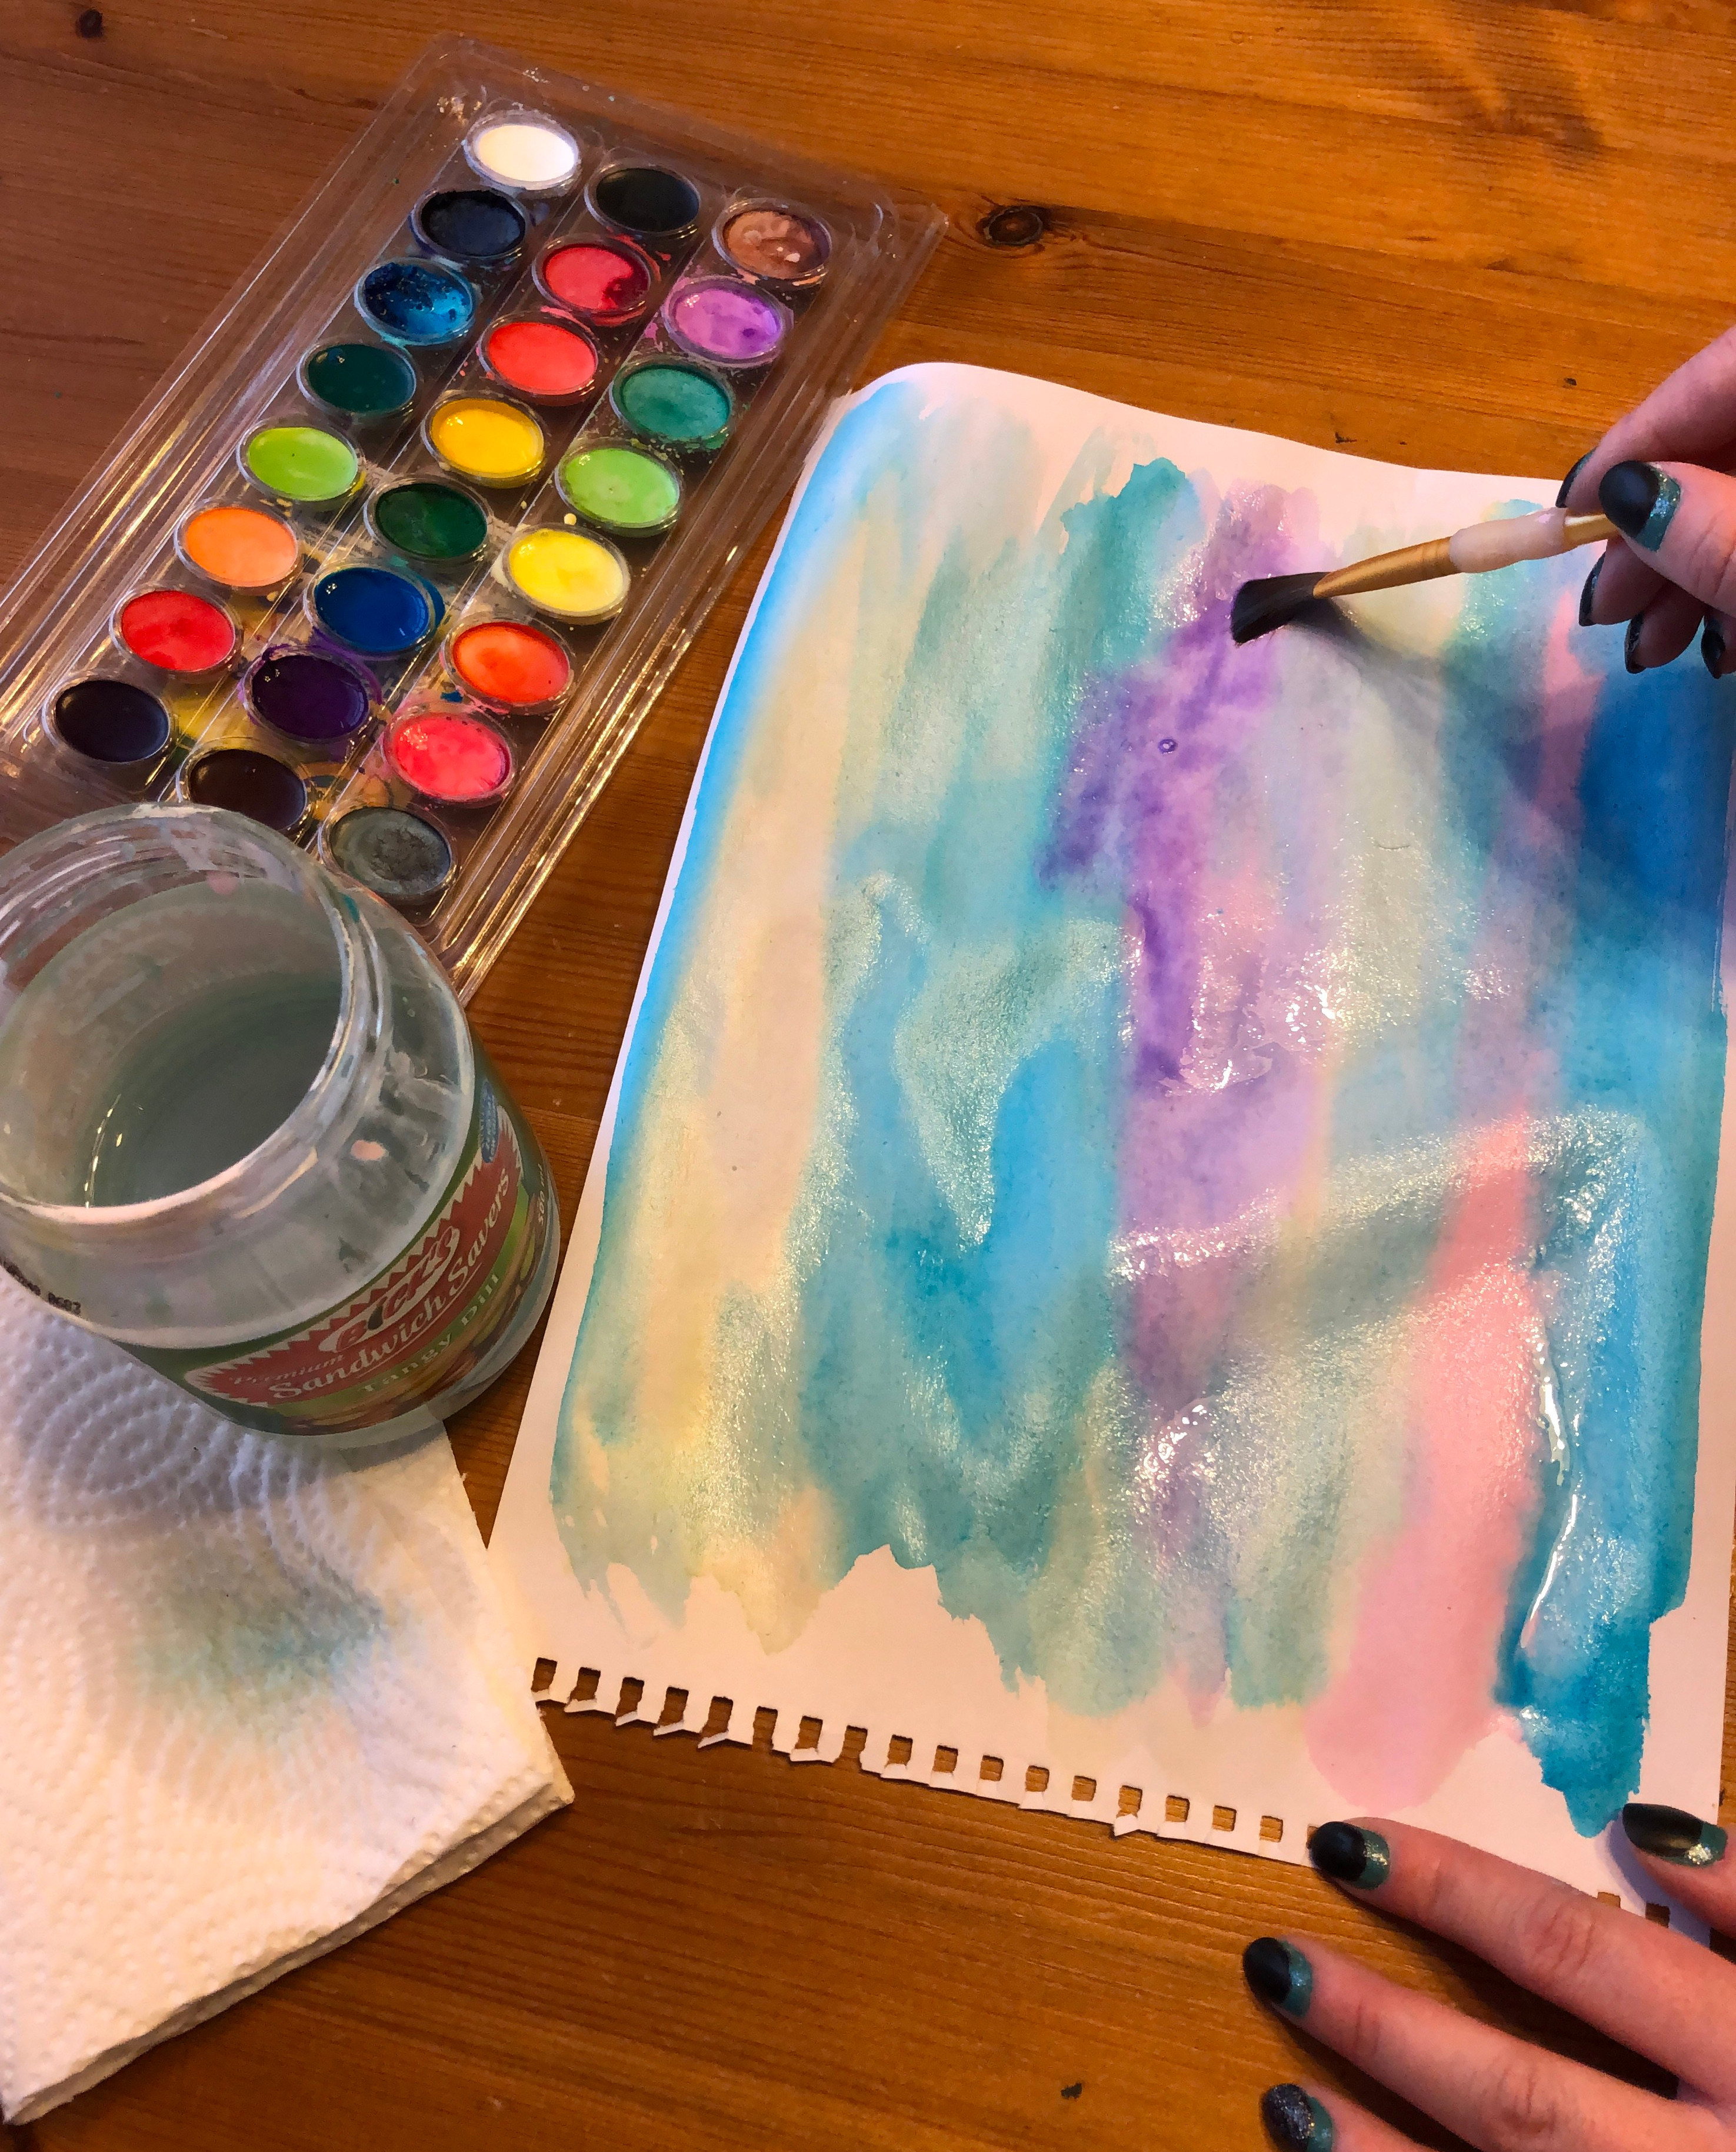
Step One: Paint Your Background
Using watercolour paints, paint a background for your birch tree scene. In class, we usually discuss what colours you see in the sky at different times of the day, what colours may you think of each season, etc.
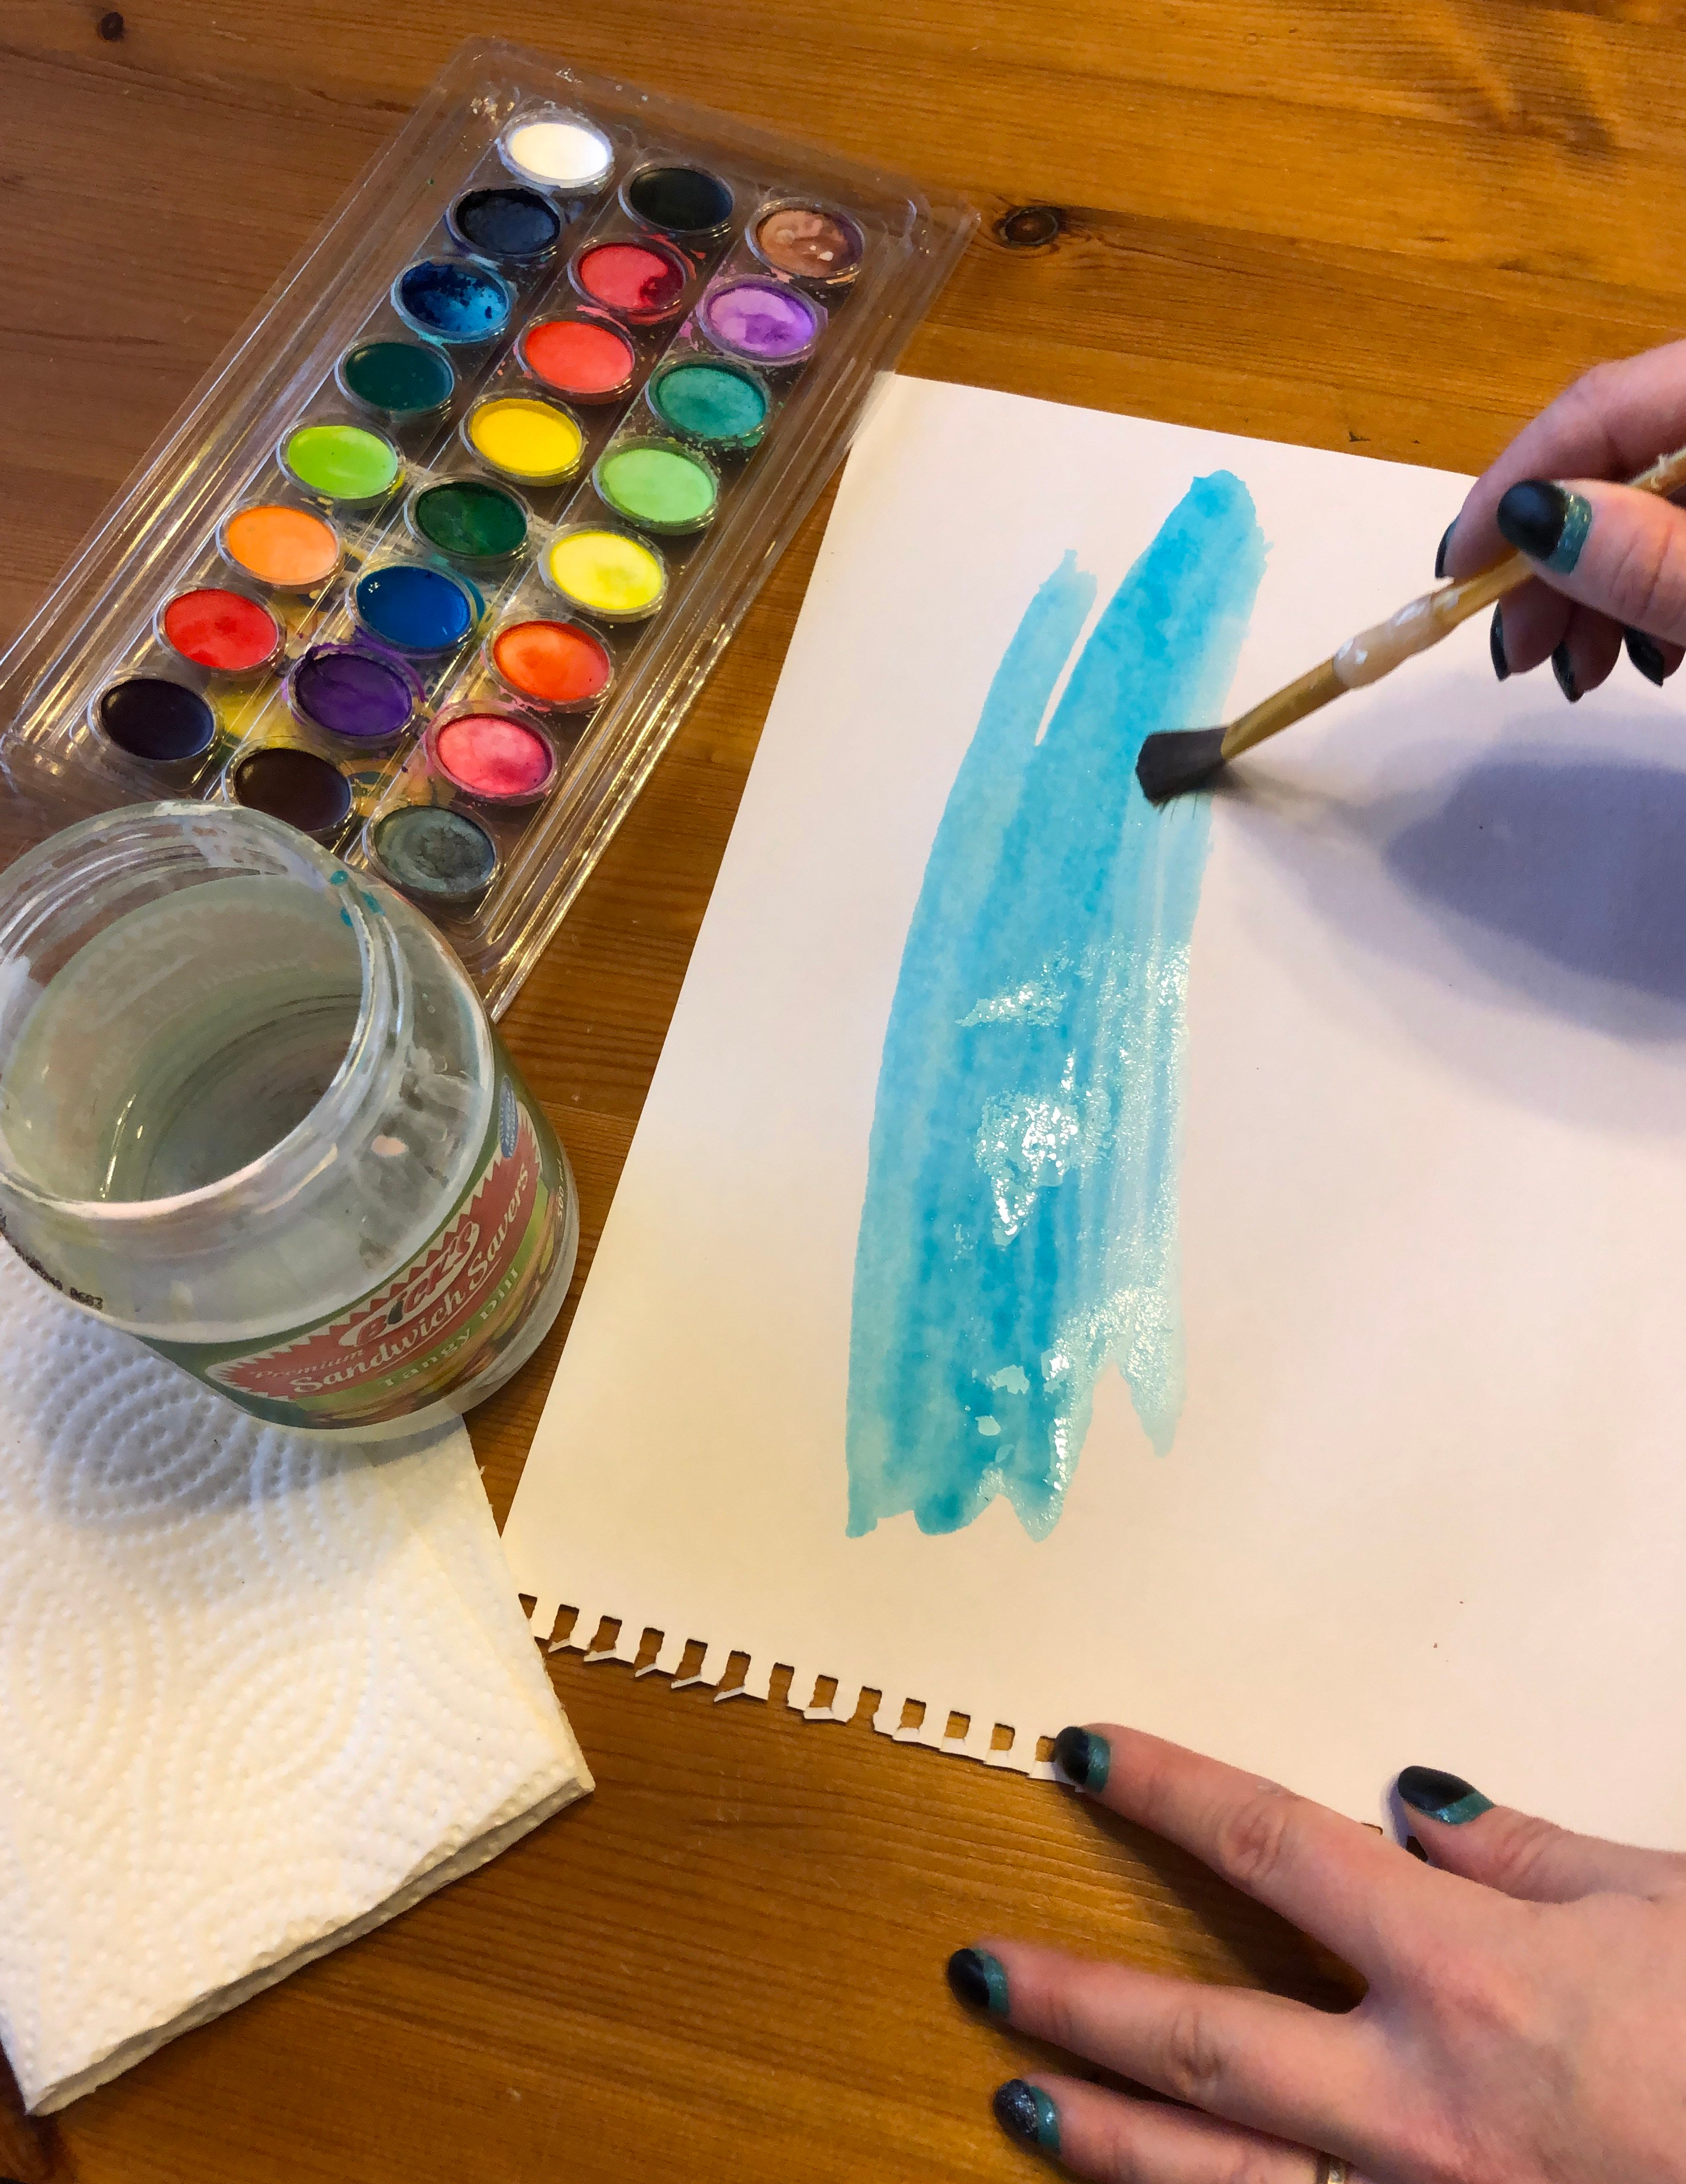
Feel free to be creative and customize this however you like. If you don’t have watercolour paints you could also make the background with acrylic paint, tempera paint, markers, or pencil crayons. Don’t use wax crayons as you will be gluing the birch trees on.
Once your background is ready, set it aside to dry.
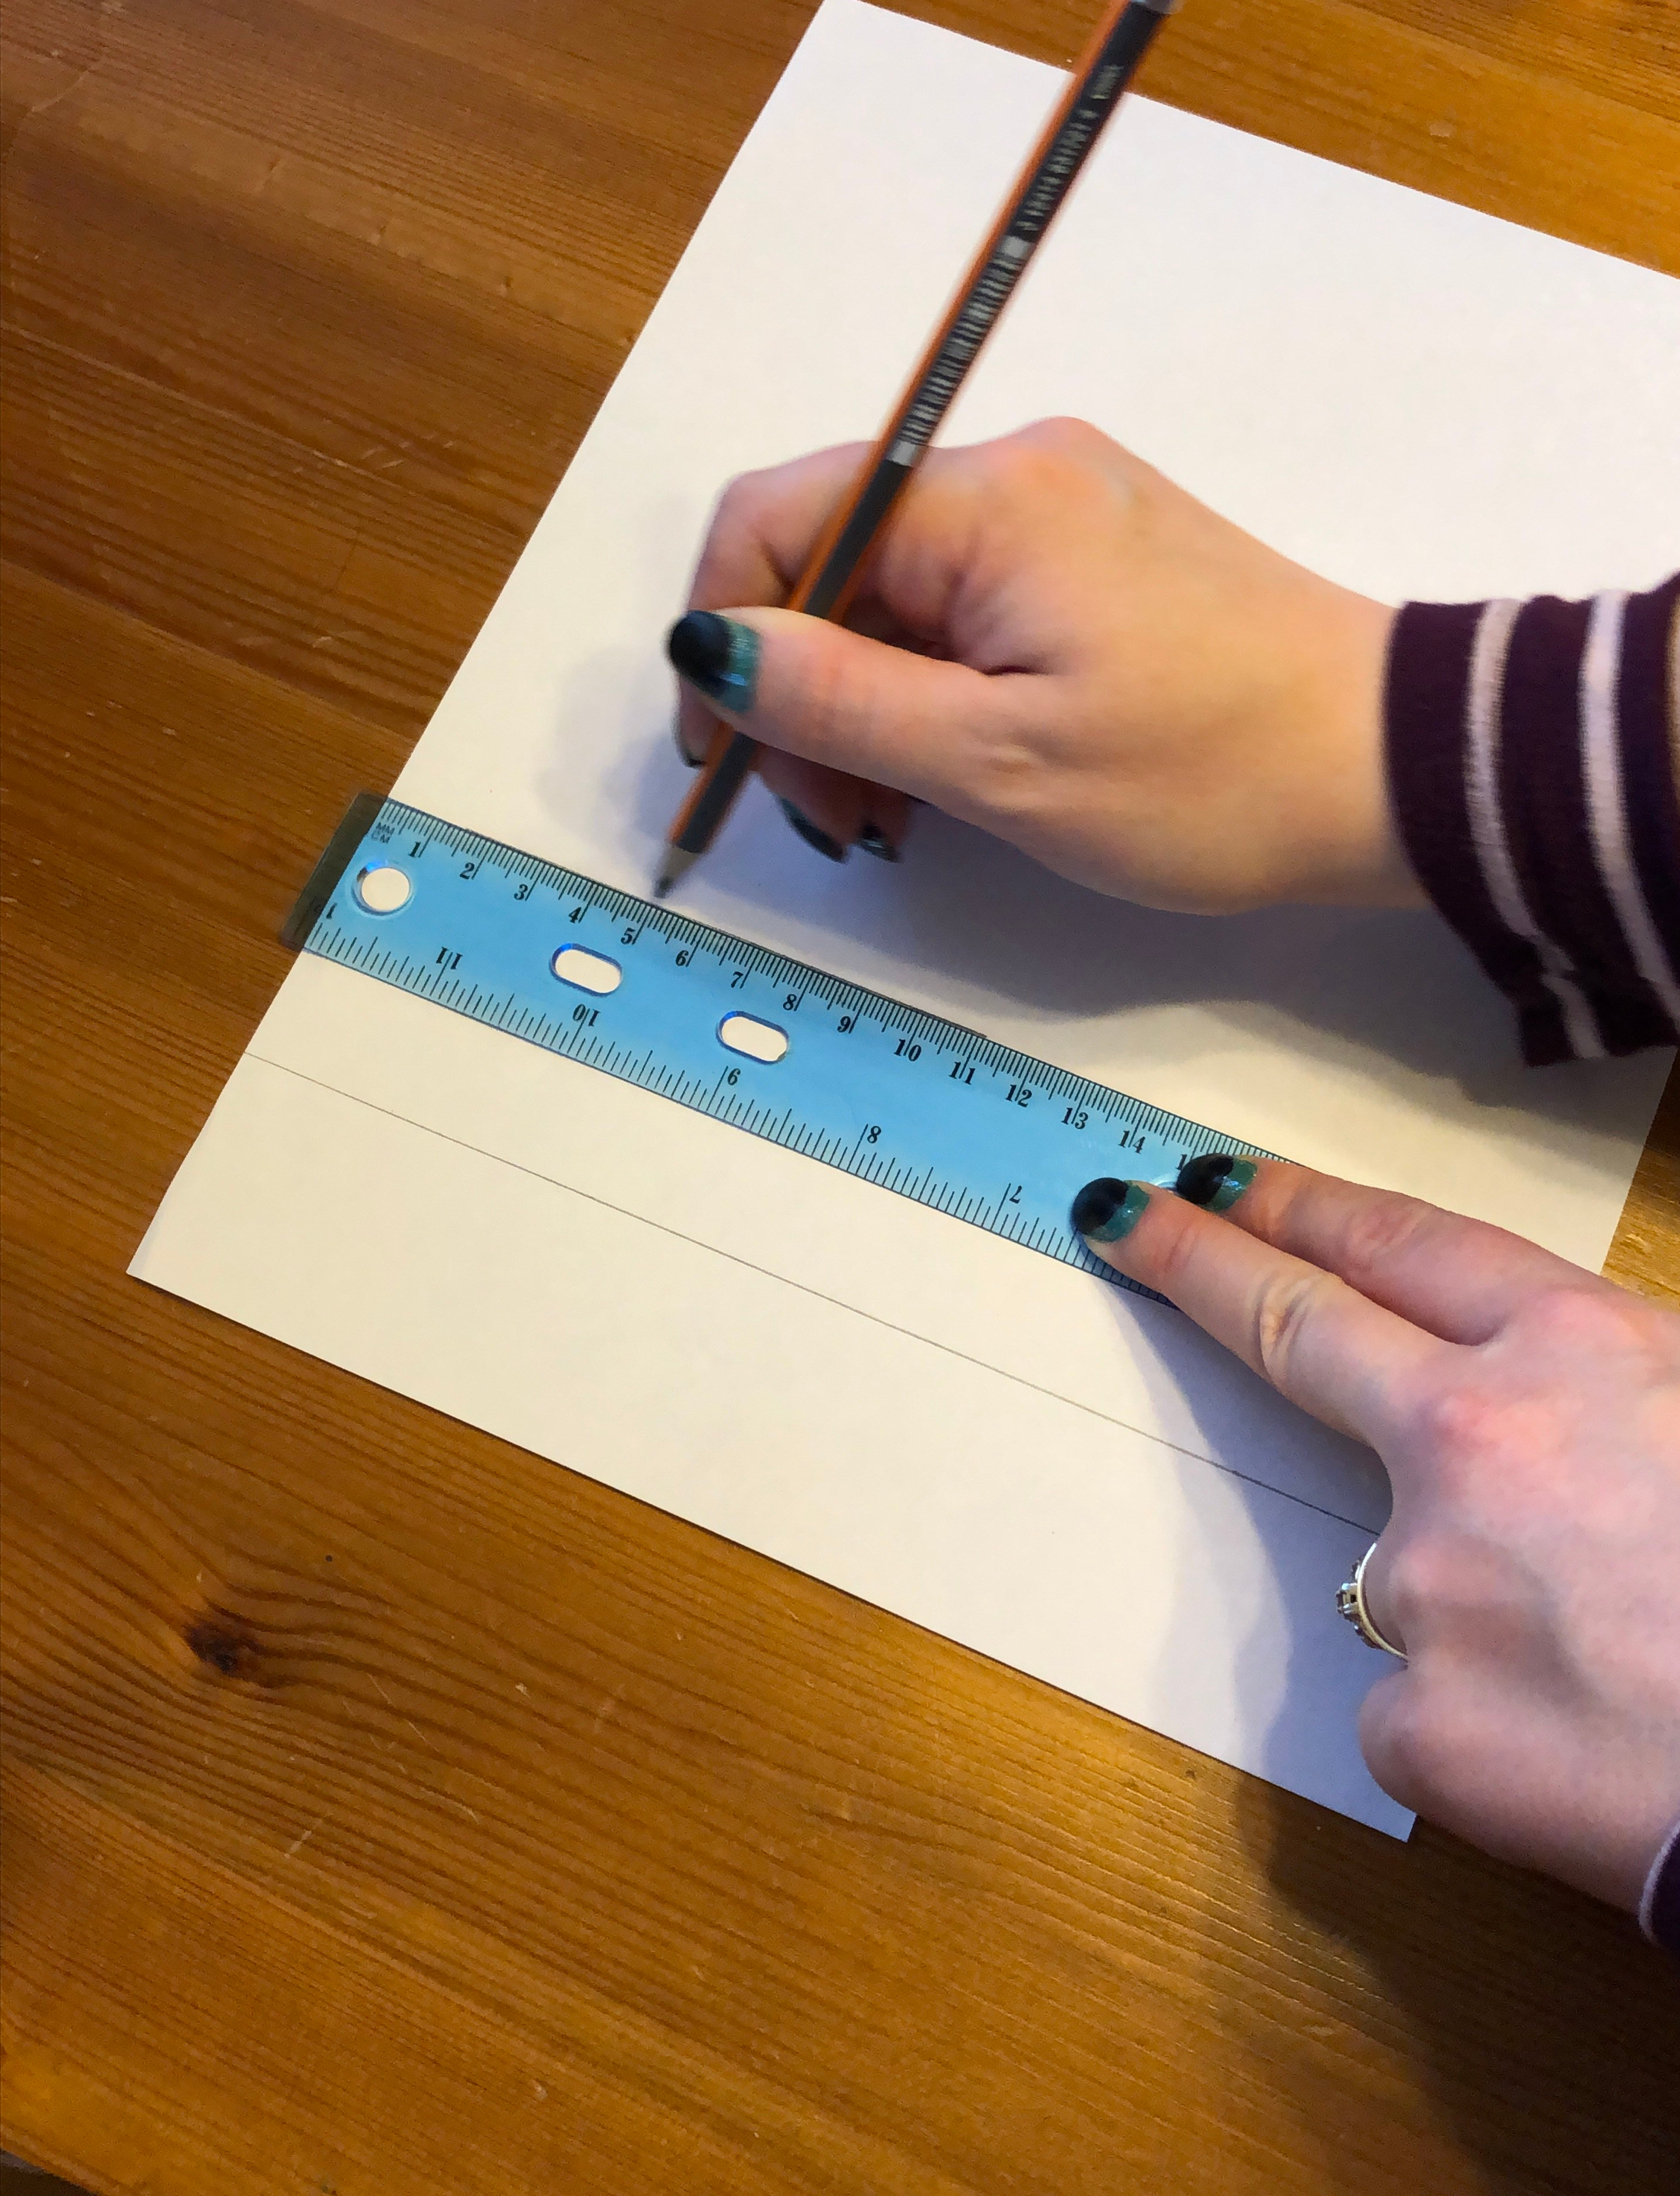
Step Two: Outline Your Trees
Using a ruler, trace lines down your paper to make rectangles for your trees. They don’t have to be consistent sizes, but make sure you have enough width to paint the bark.
Step Three: Paint Your Bark
To create the birch tree back effect you will need to cut out a piece of cardboard. If you’re like me and have been social distancing and have ordered some items online recently you can put one of those boxes to good use.
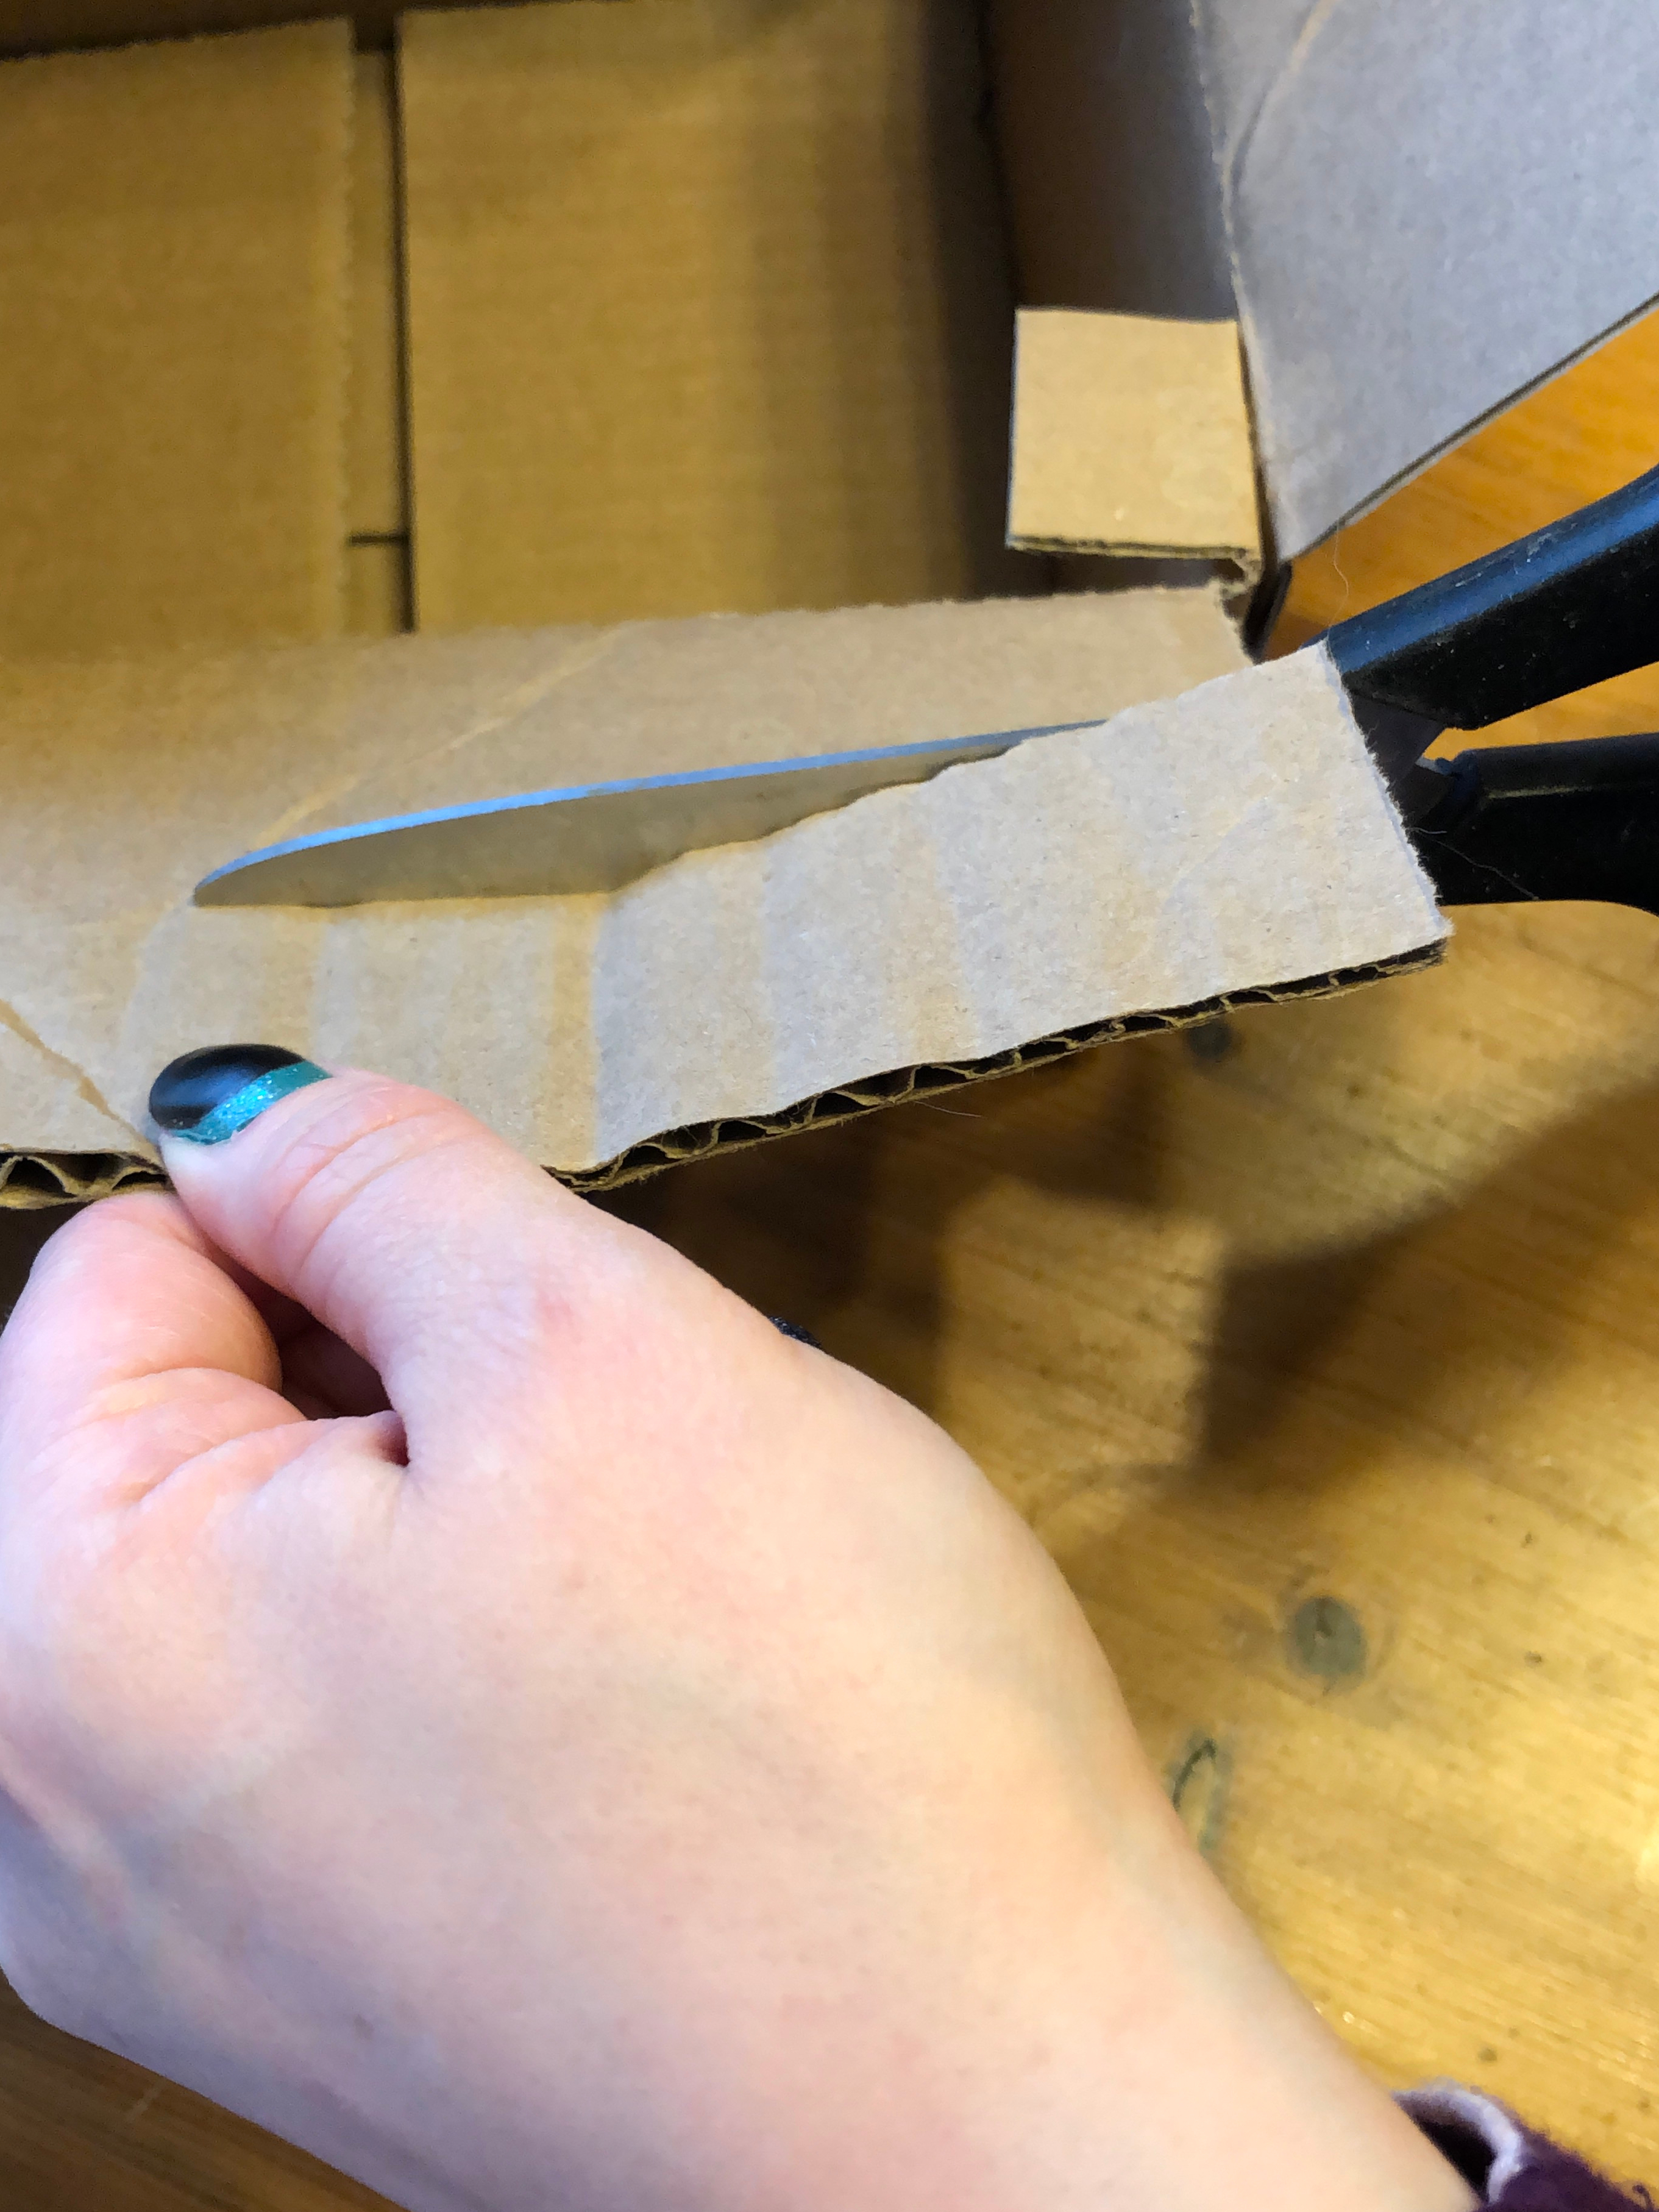
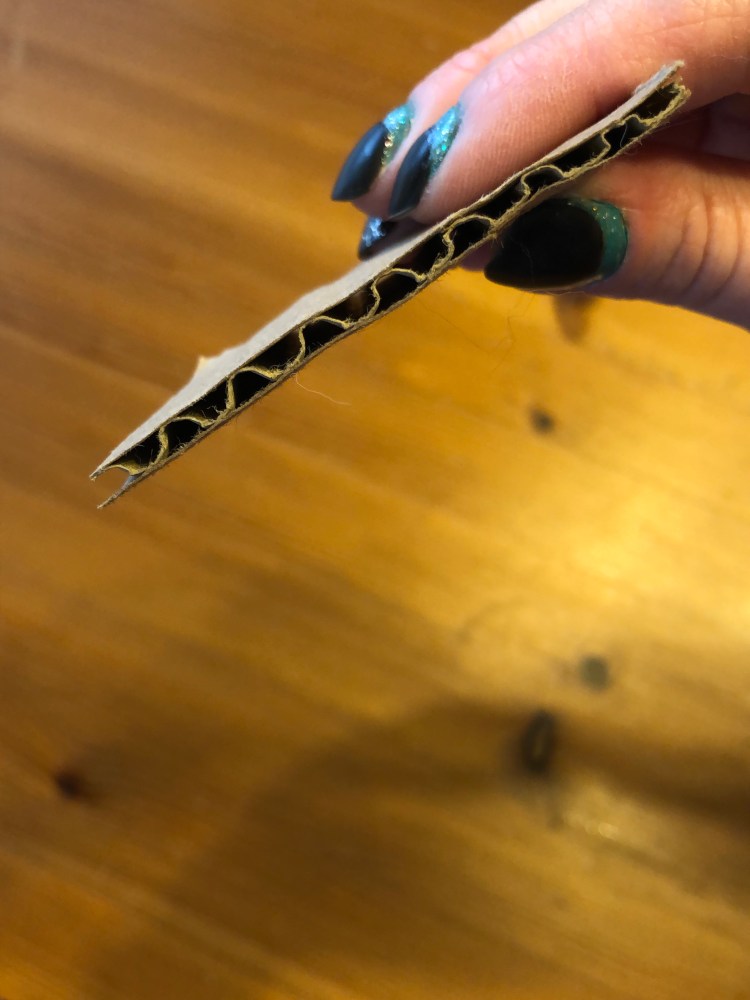
I recommend cutting the cardboard into small pieces so that you can drag it across the tree trunks alternating from side to side for the full length of the tree.
Dip the cardboard in to black acrylic paint. You can also dip some white on there if you want. Be careful not to put too much paint on the cardboard. Less is more for this technique.

Place the cardboard paint side down on one edge of your tree trunk
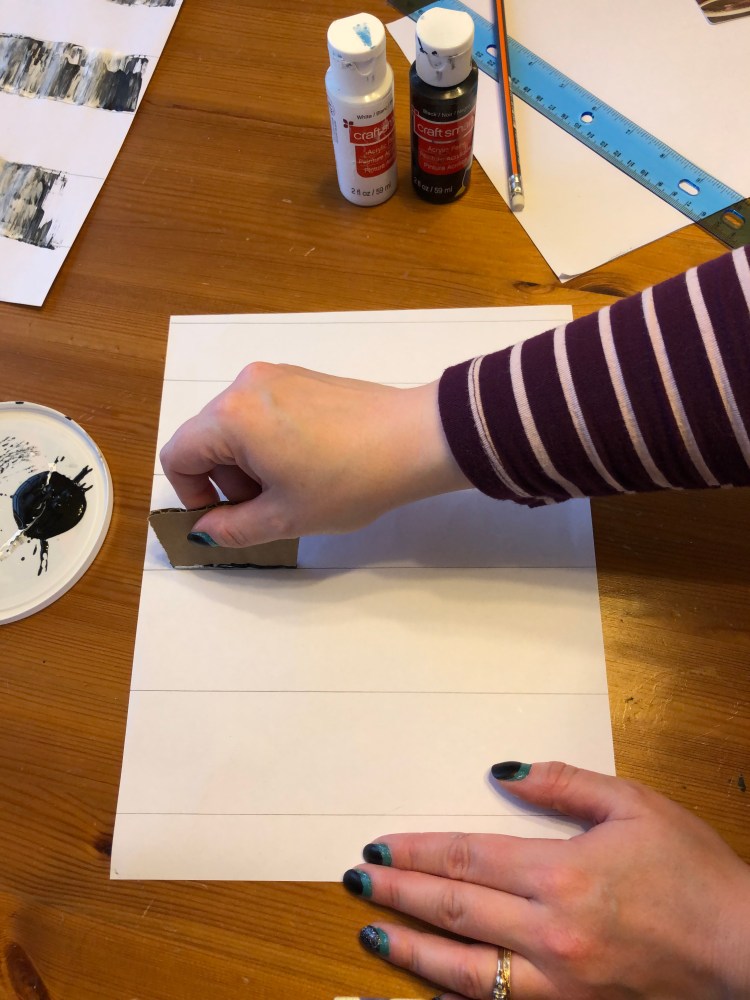
and drag it across to the other side.

Alternate to the other side of the tree trunk just below where you just pulled the cardboard across and repeat. Keep doing this until the whole tree is filled. Pro tip: if you drag the cardboard at a bit of an angle your can make the tree trunk look rounder and more realistic.
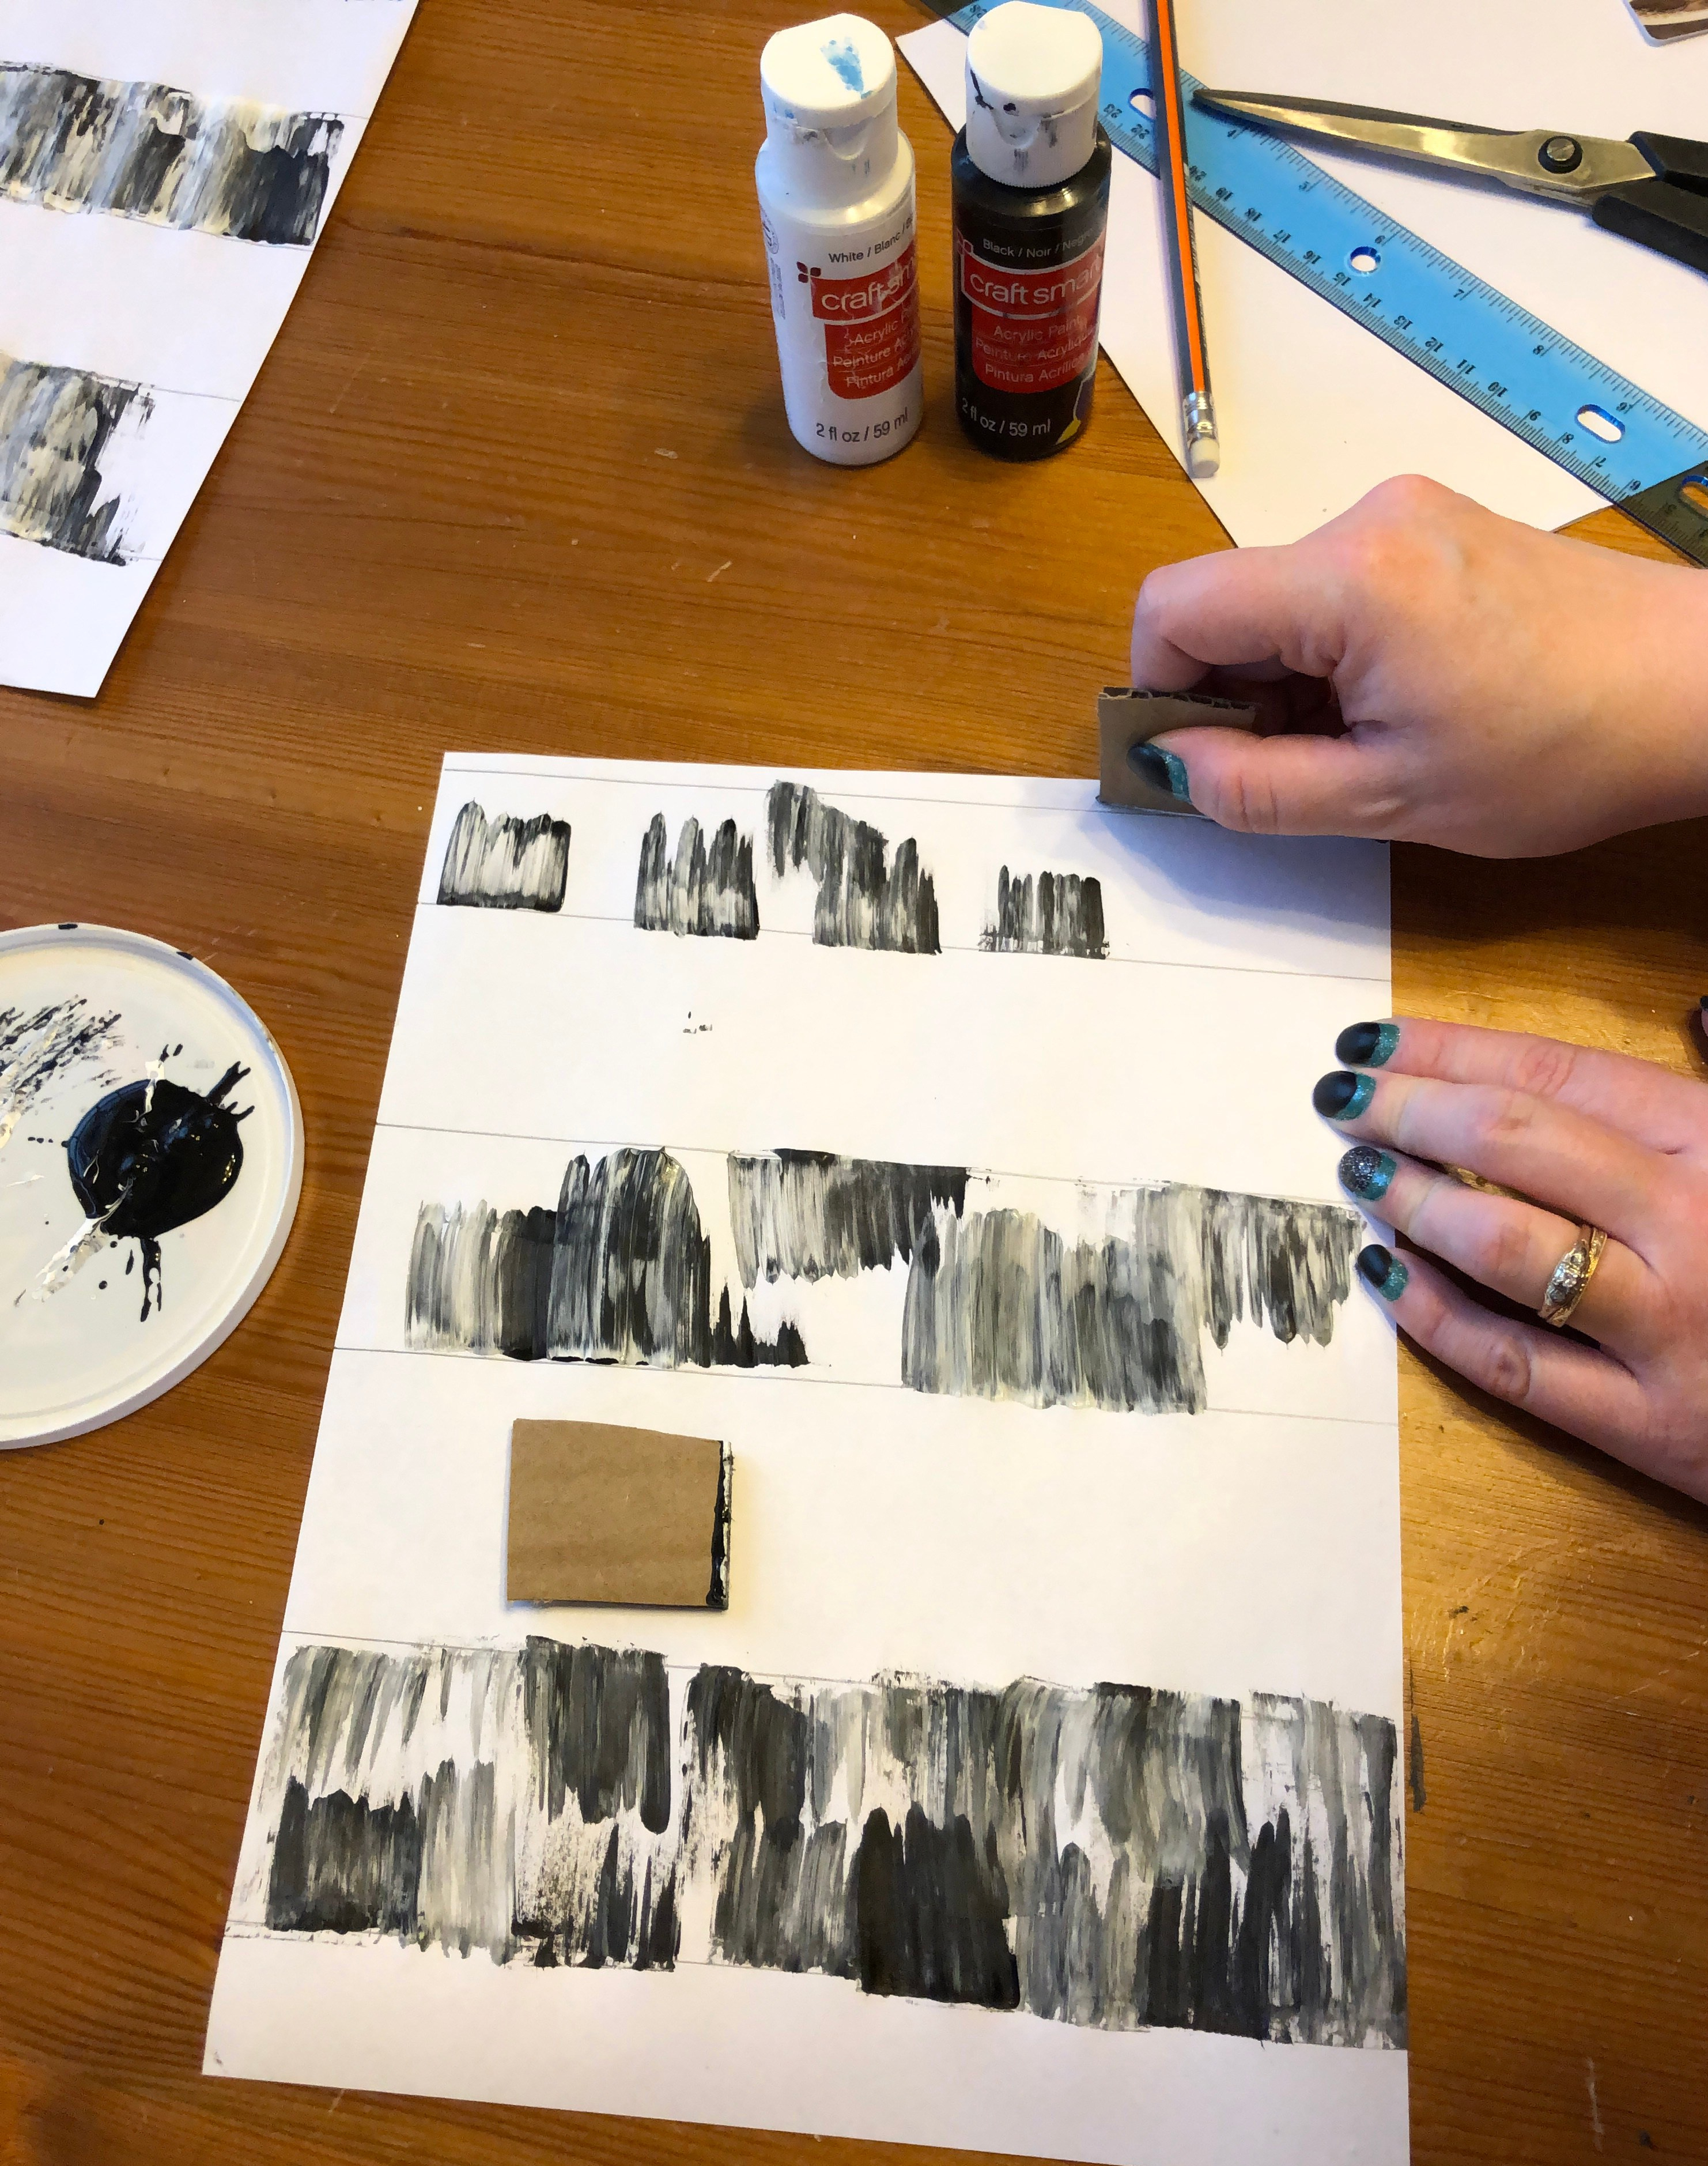
If you get too much black in one spot you can dip the cardboard in some white paint and drag it back across. If the paint is still wet you will get a bit of grey, so you may want to let it dry before trying to correct it with this layering technique. I personally like a little of the grey as it looks more realistic, but I will leave this up to you.
Again, I recommend using as little paint as possible for your trees, but to give you an idea I have done these with varying amounts of paint.
Also, If you want to make branches just make an extra tree that you can cut up. I’ll get to that in a minute.
Once you have added the bark texture to all of your trees, set them aside to dry.
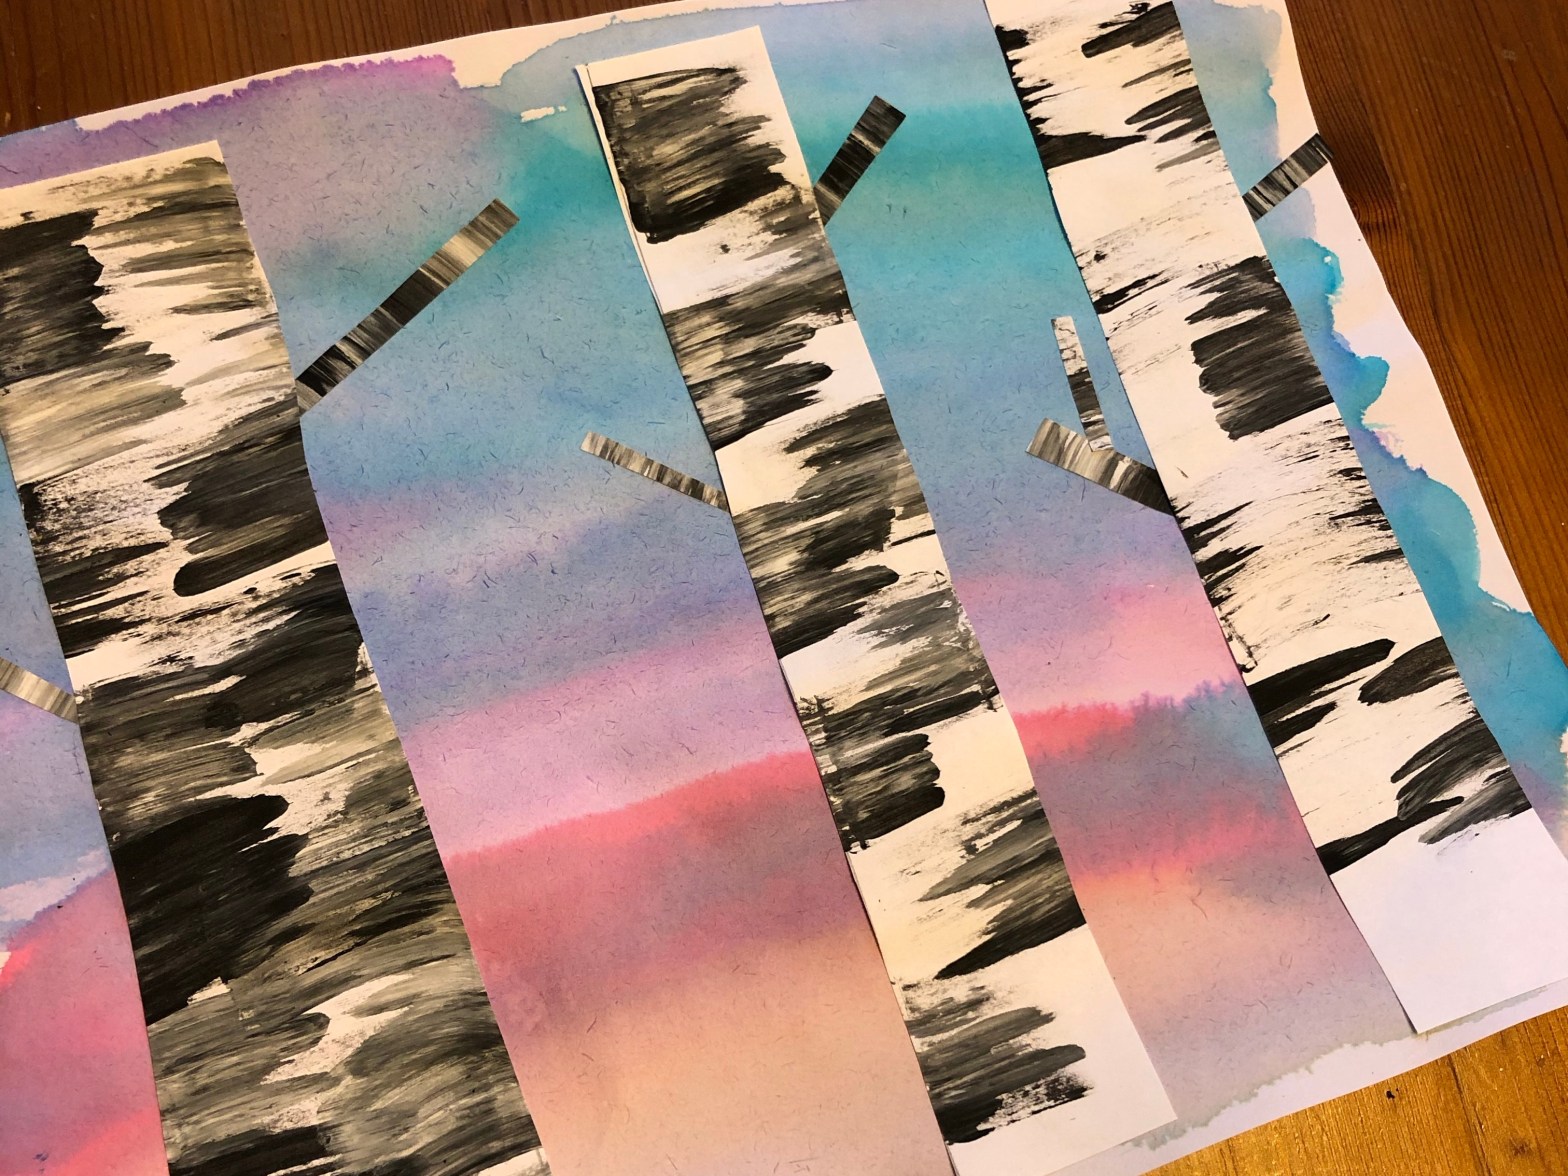
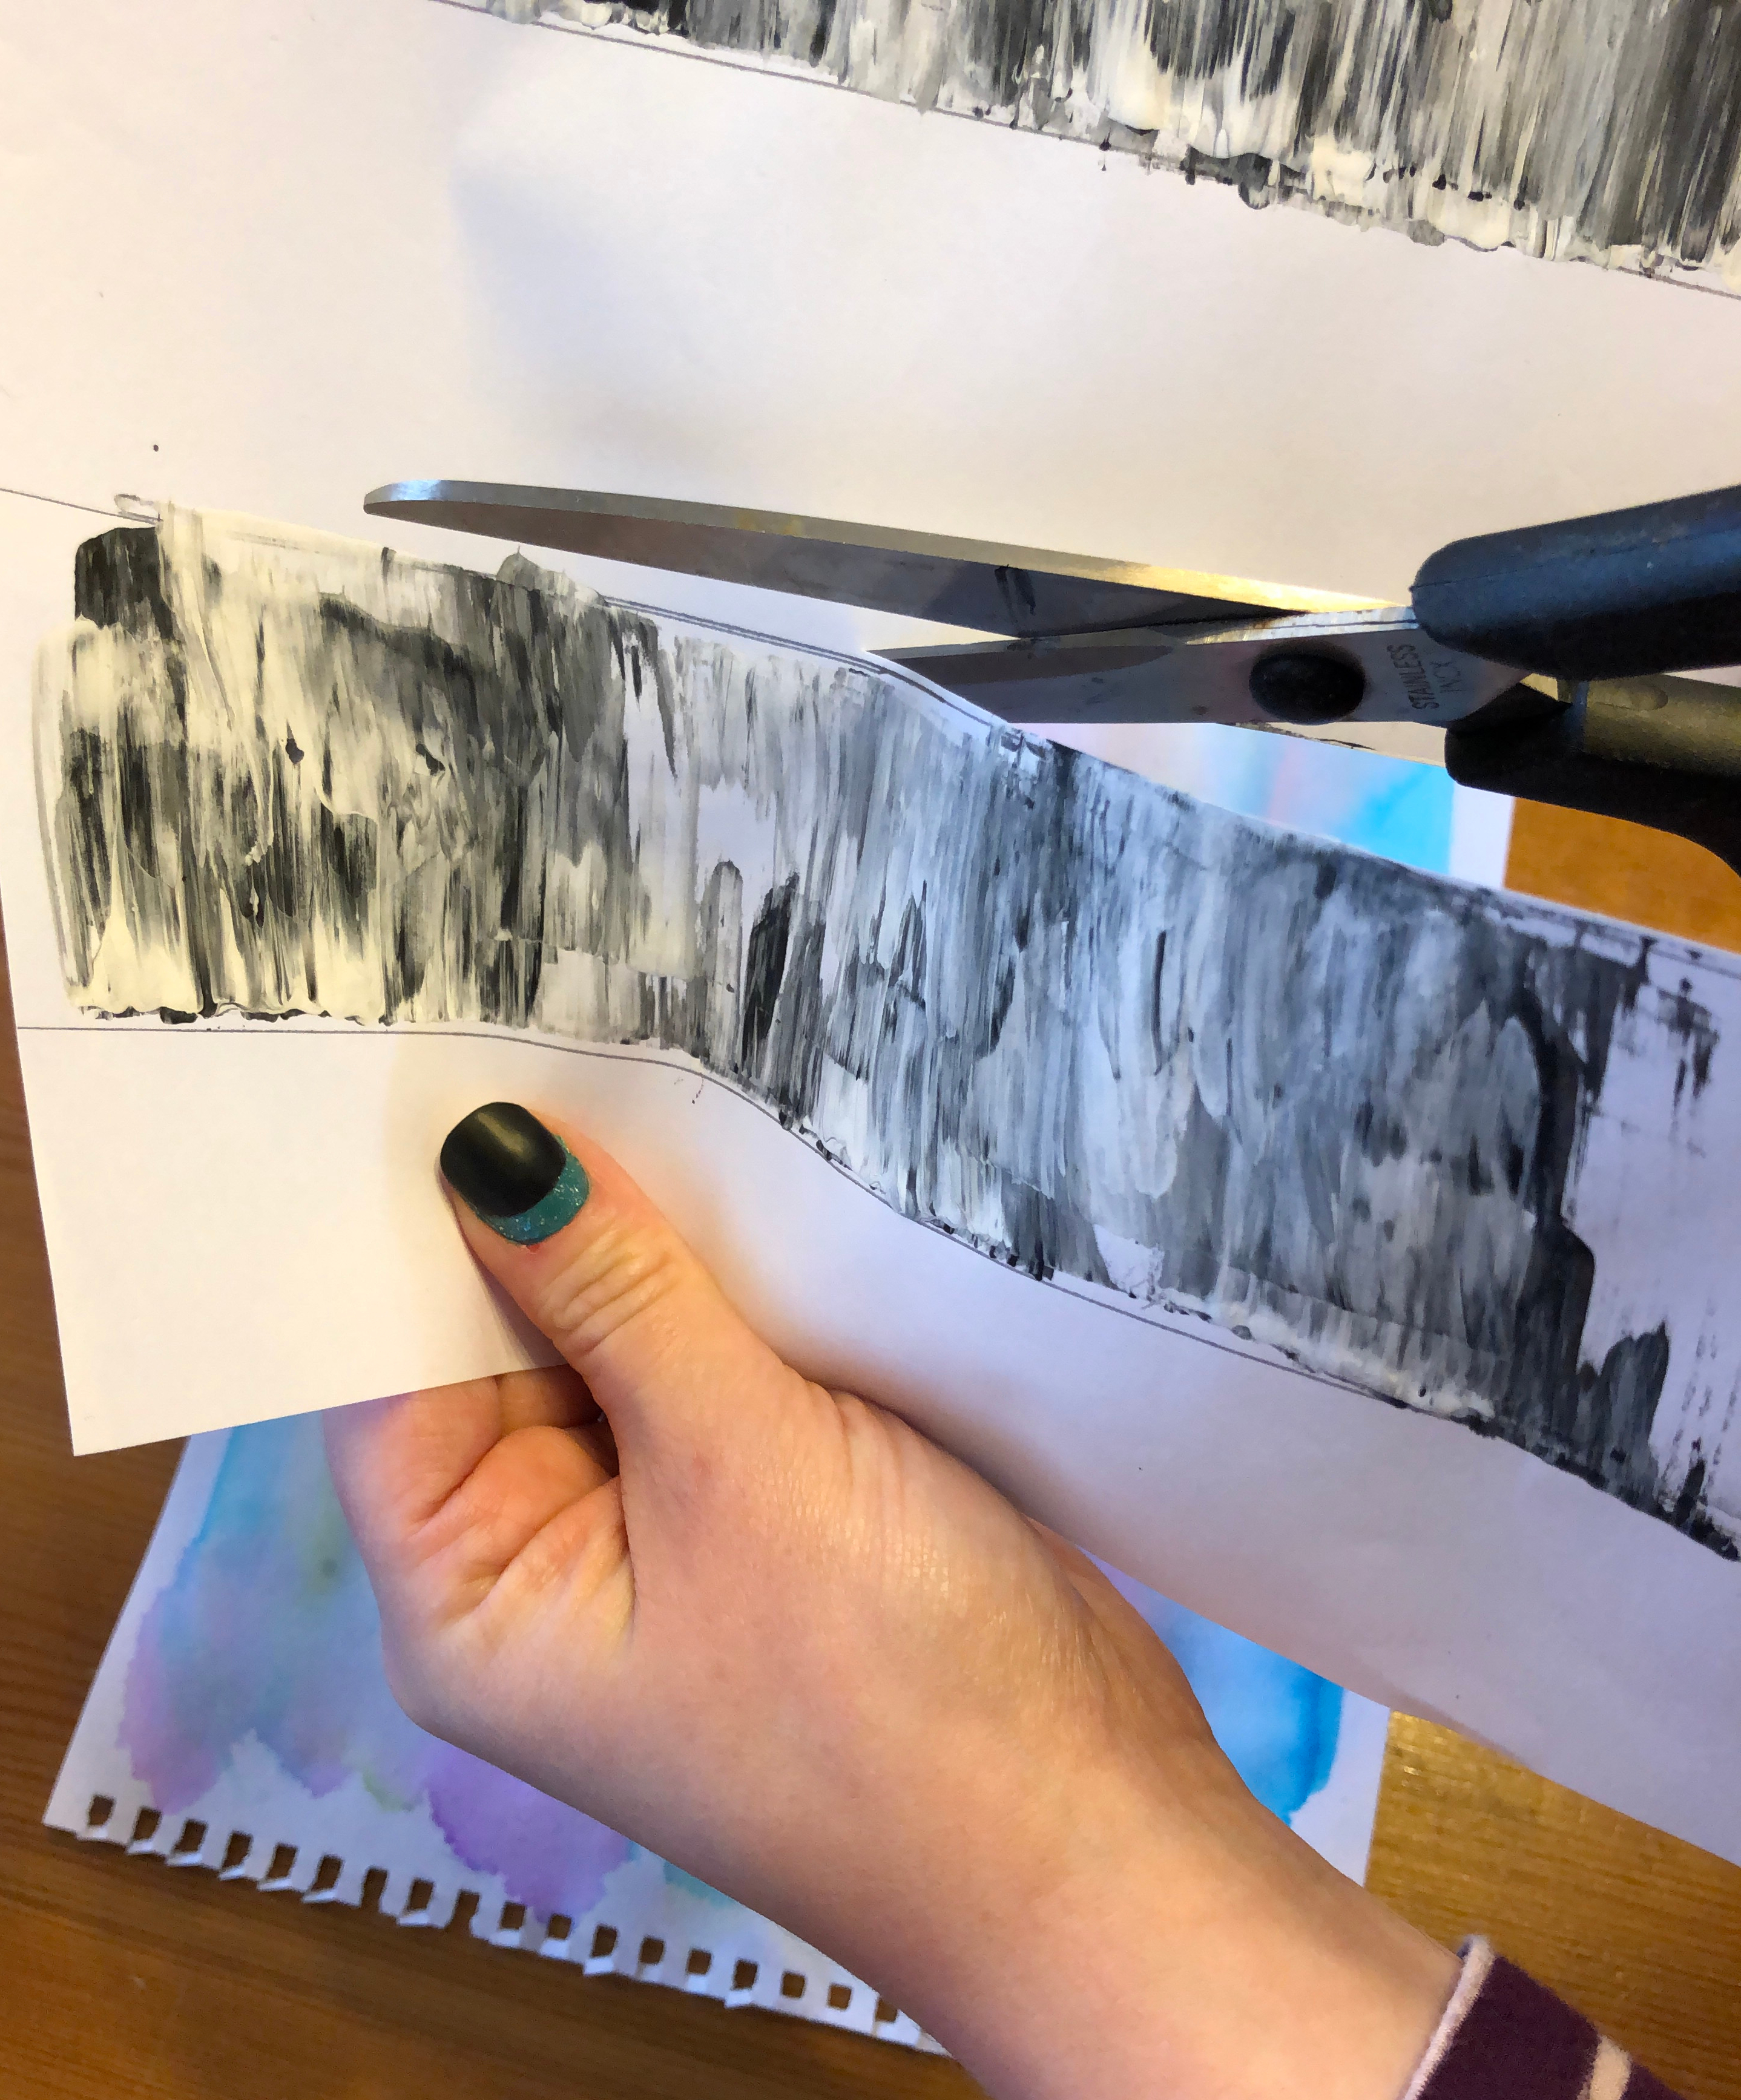
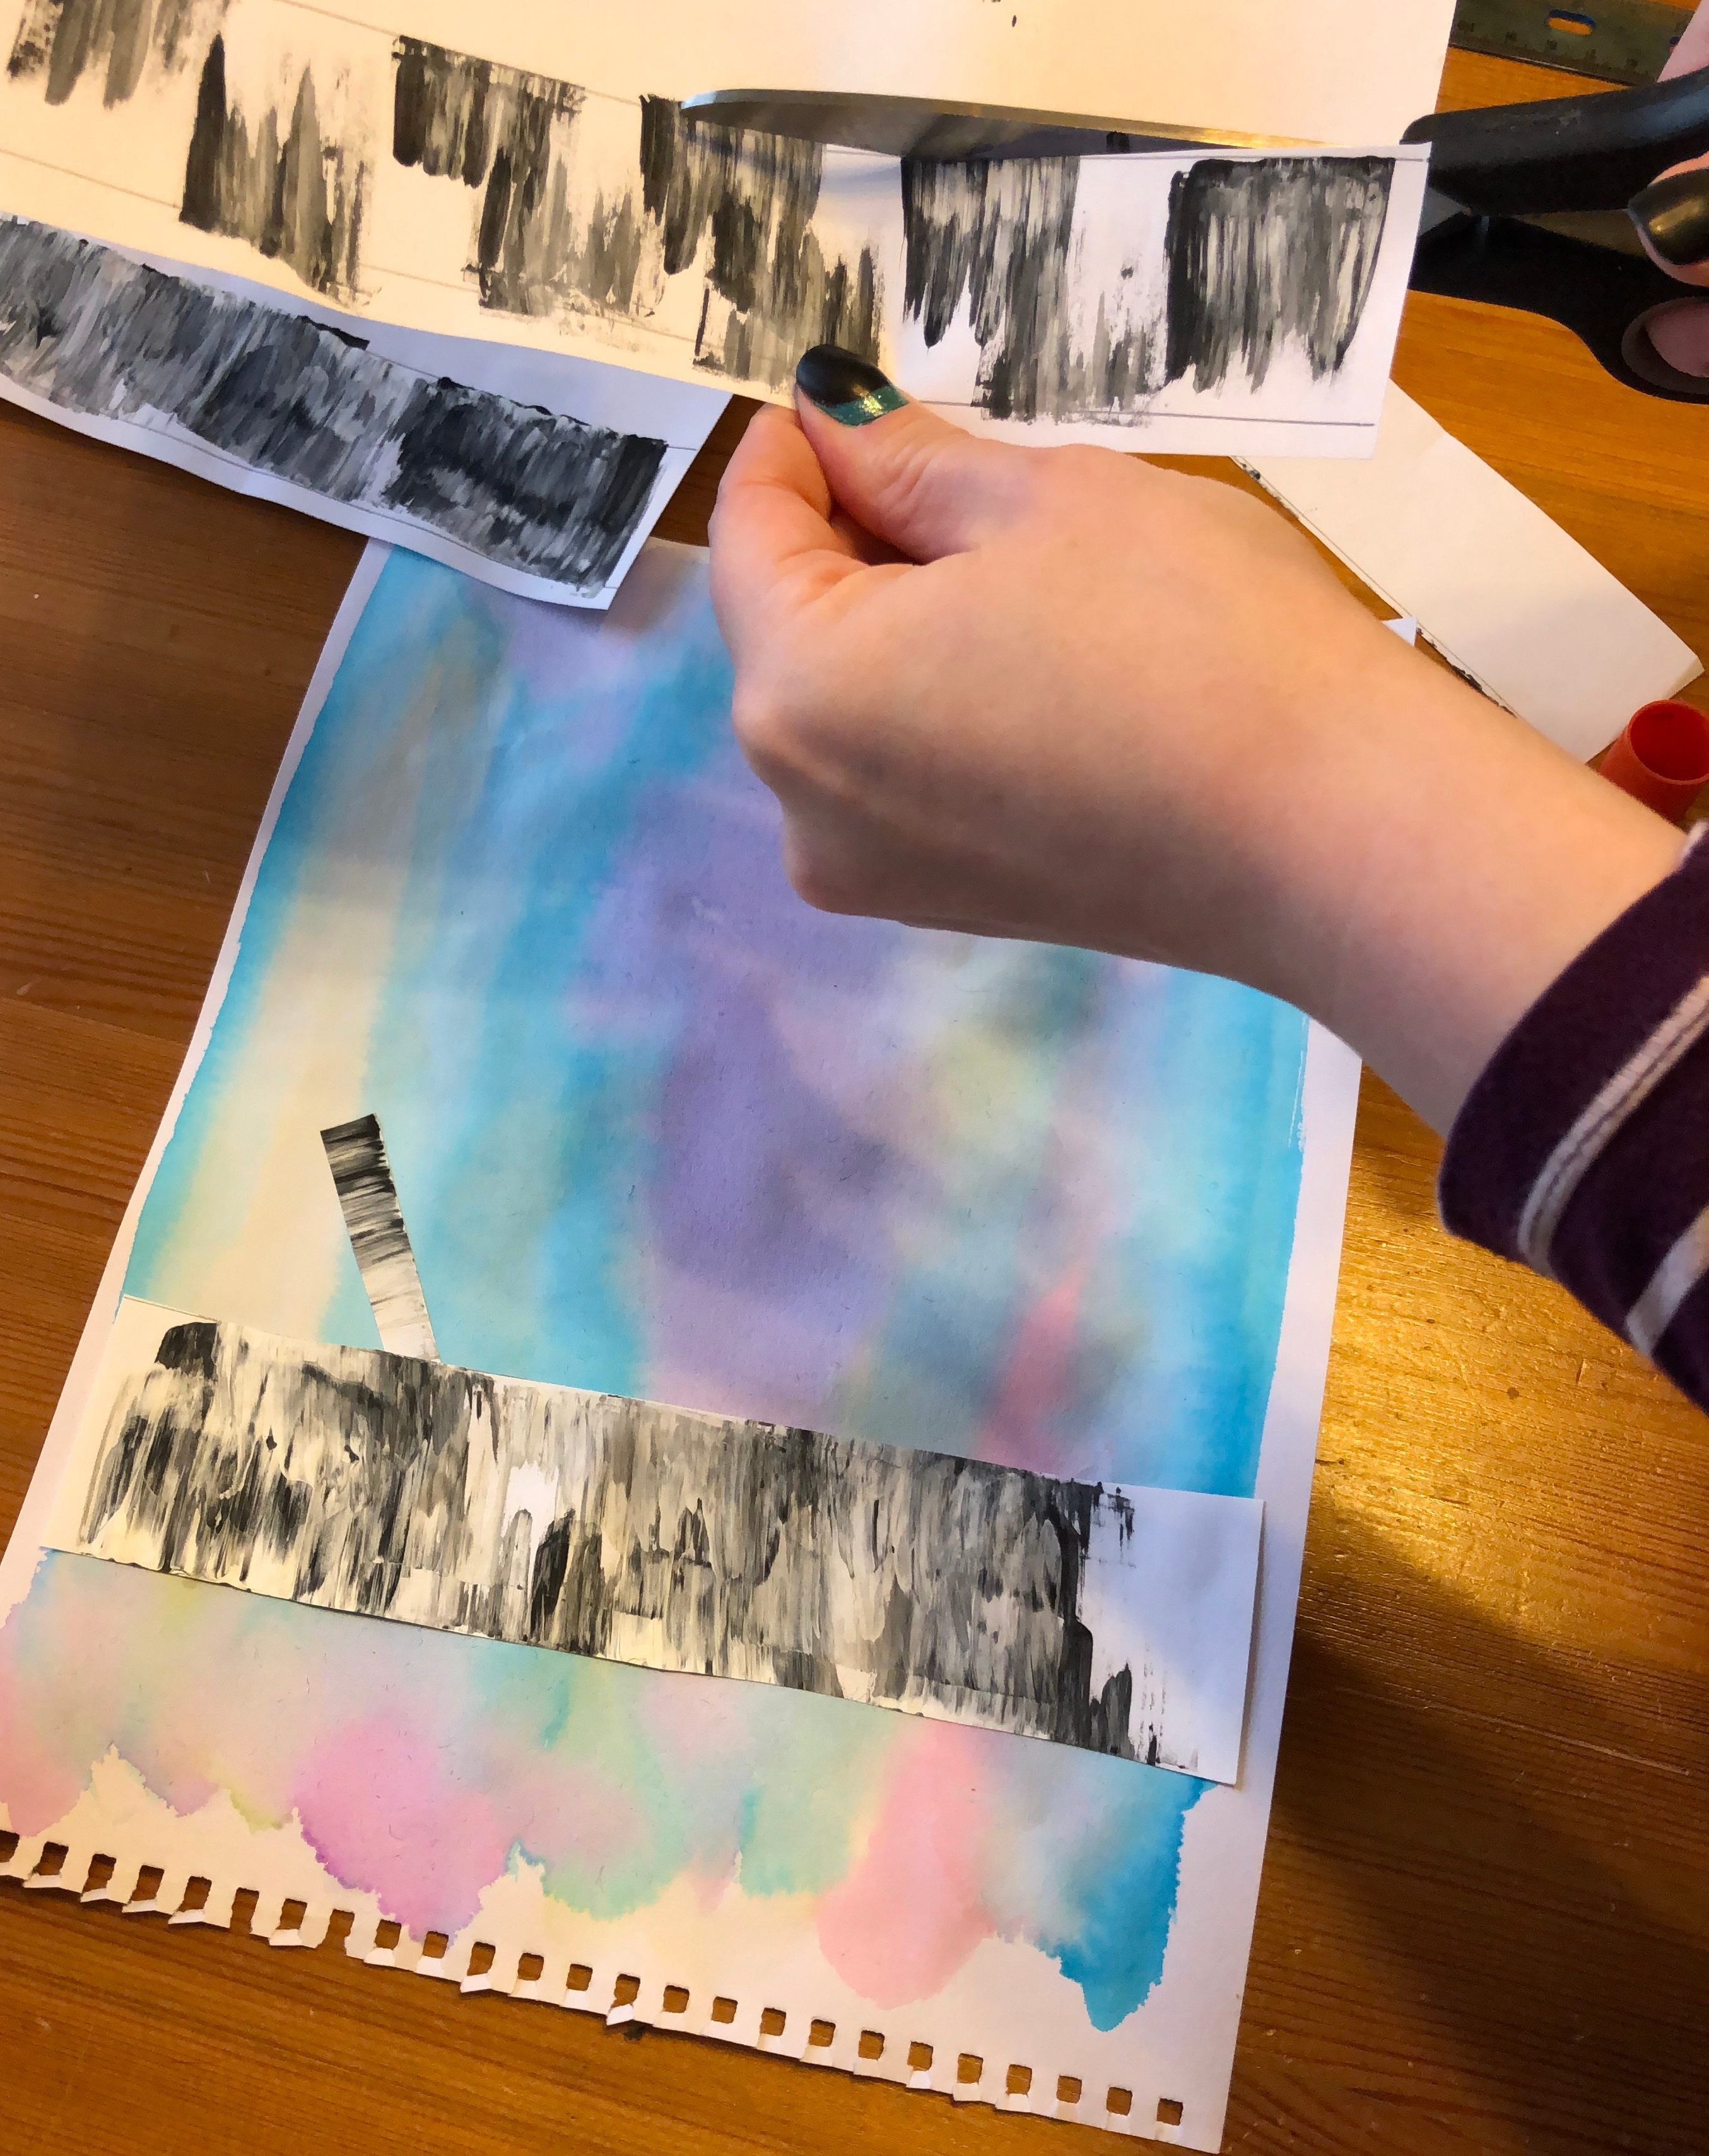
Step Four: Cut and Paste
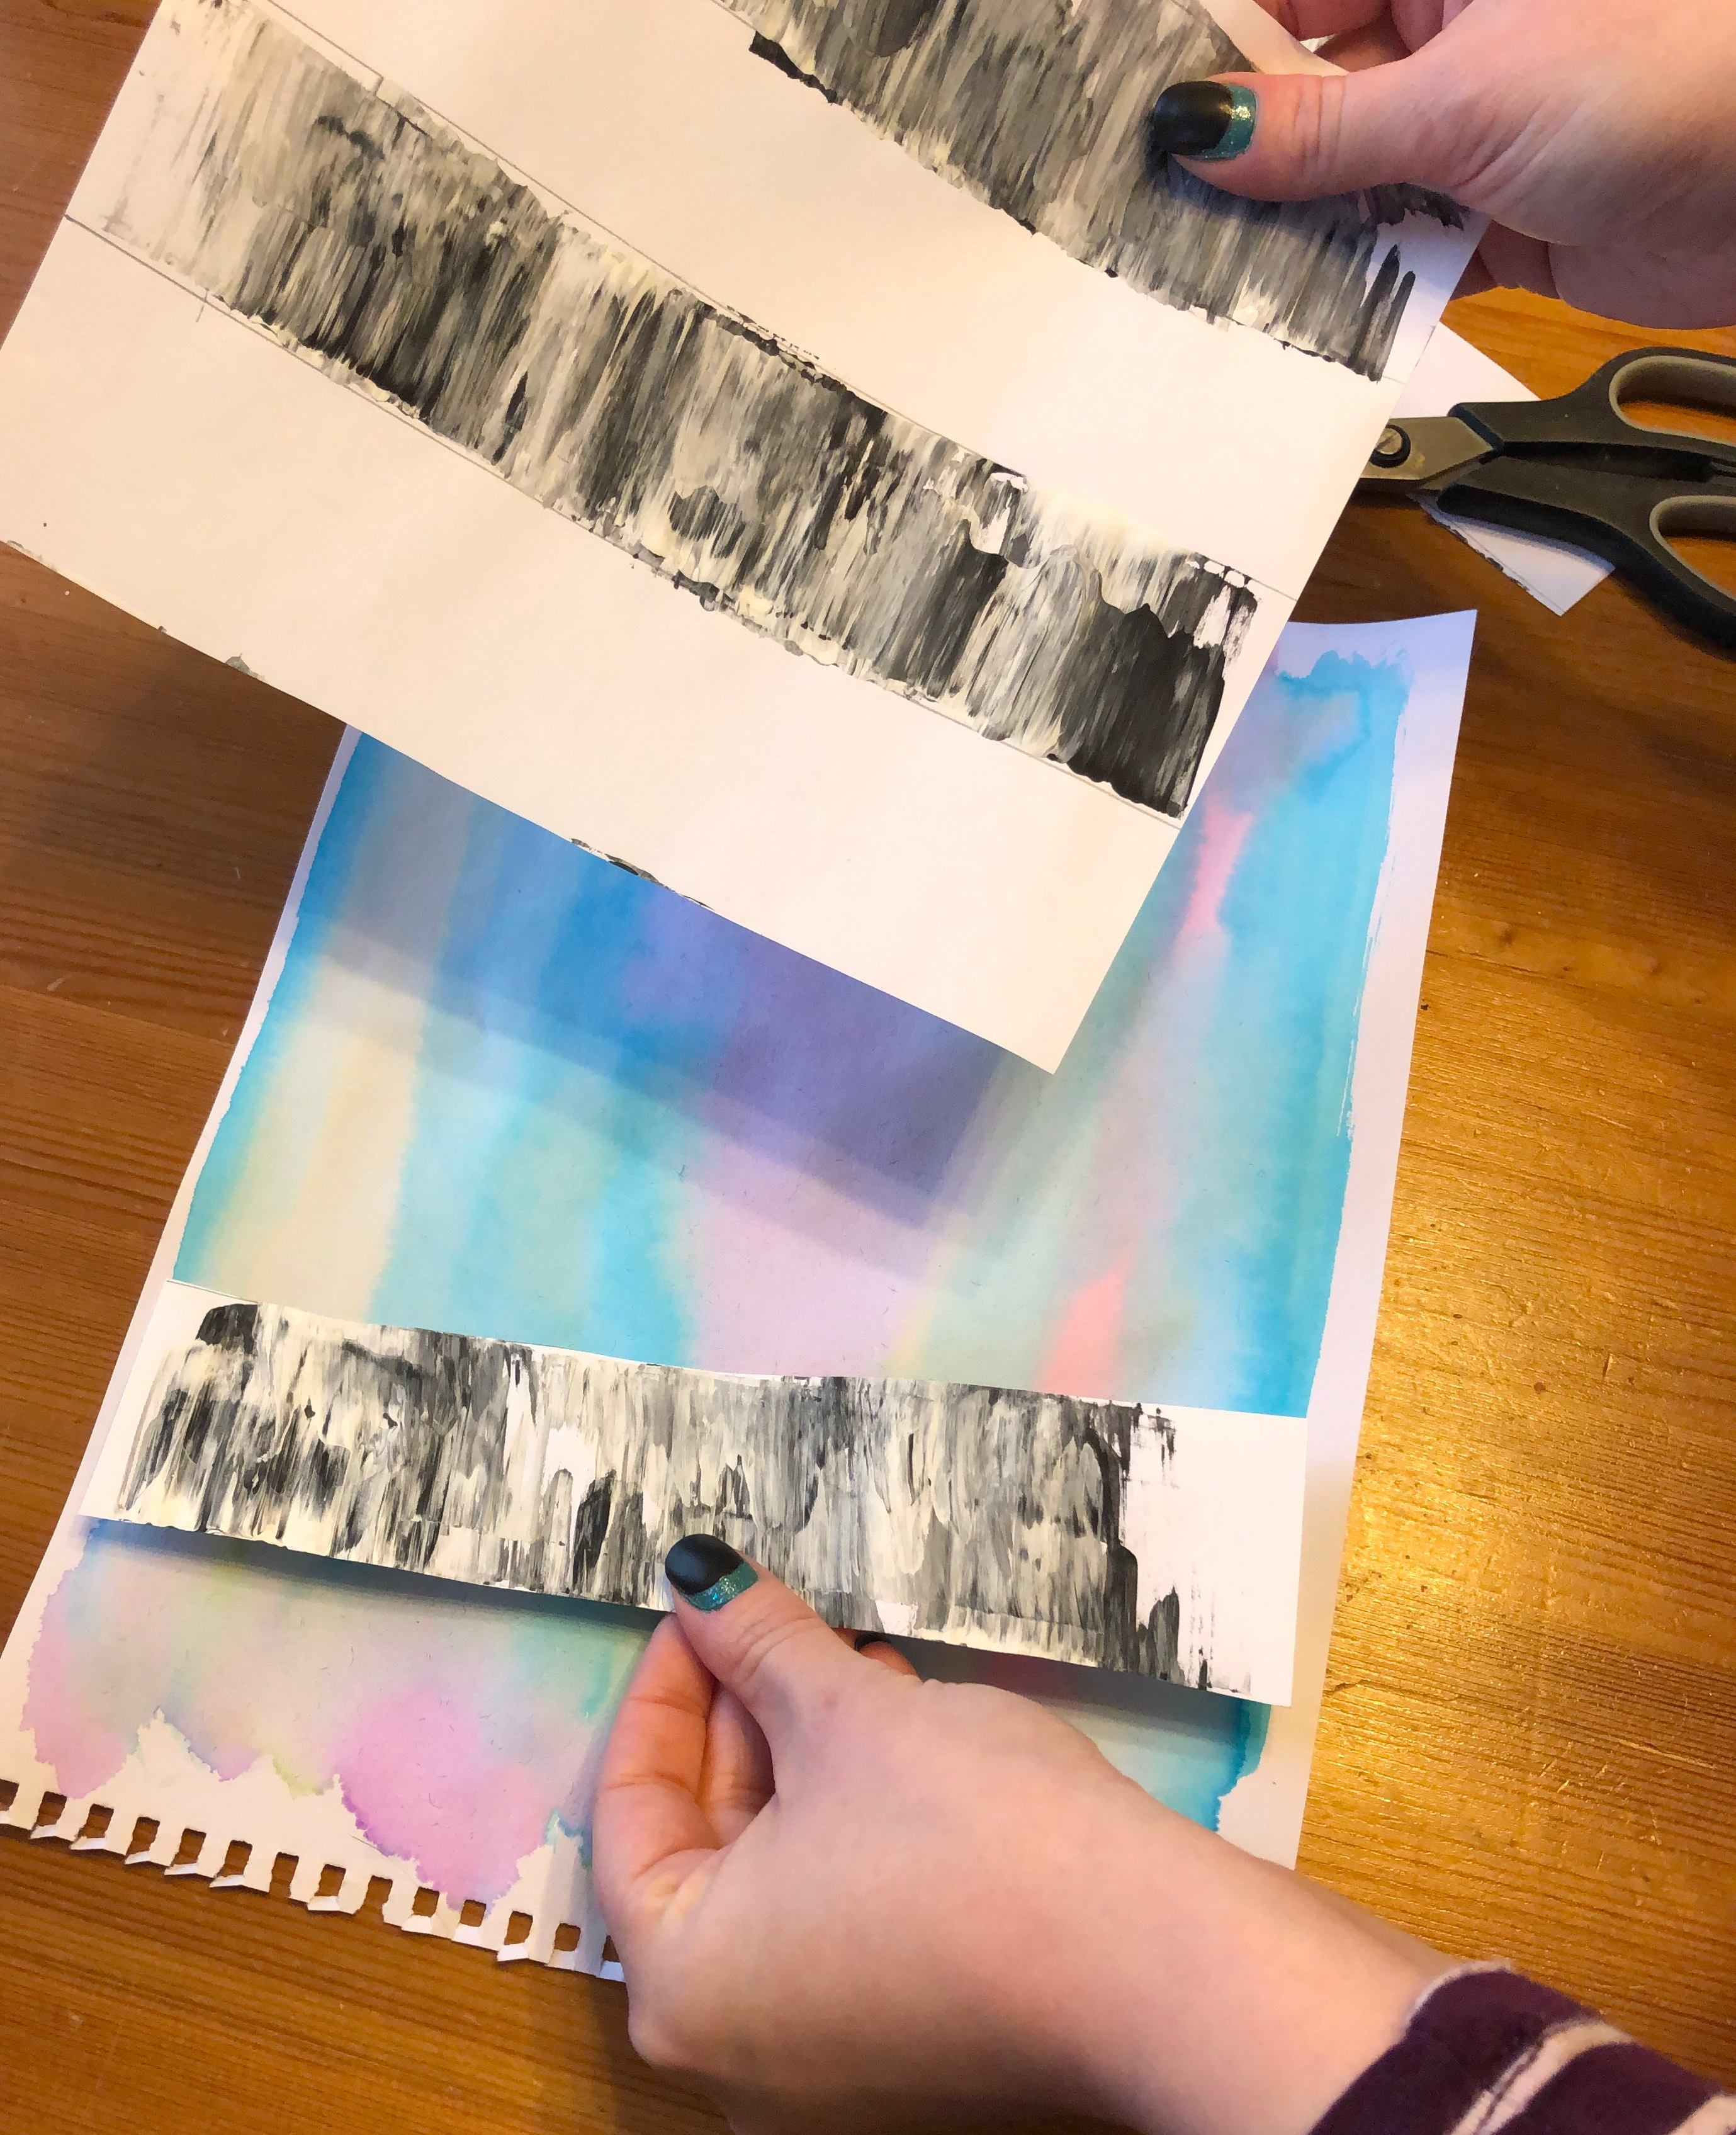
When both your background and the trees are dry you can put your artwork together.
Cut out the trees following the guidelines you traced. If your paint doesn’t quite reach the edge just trim it – trees don’t grow perfectly straight in nature so if your lines are perfectly straight that’s a-ok.
If you want to add branches, all you need to do is take an extra tree and cut out small, thin rectangles and attach them to your tree.
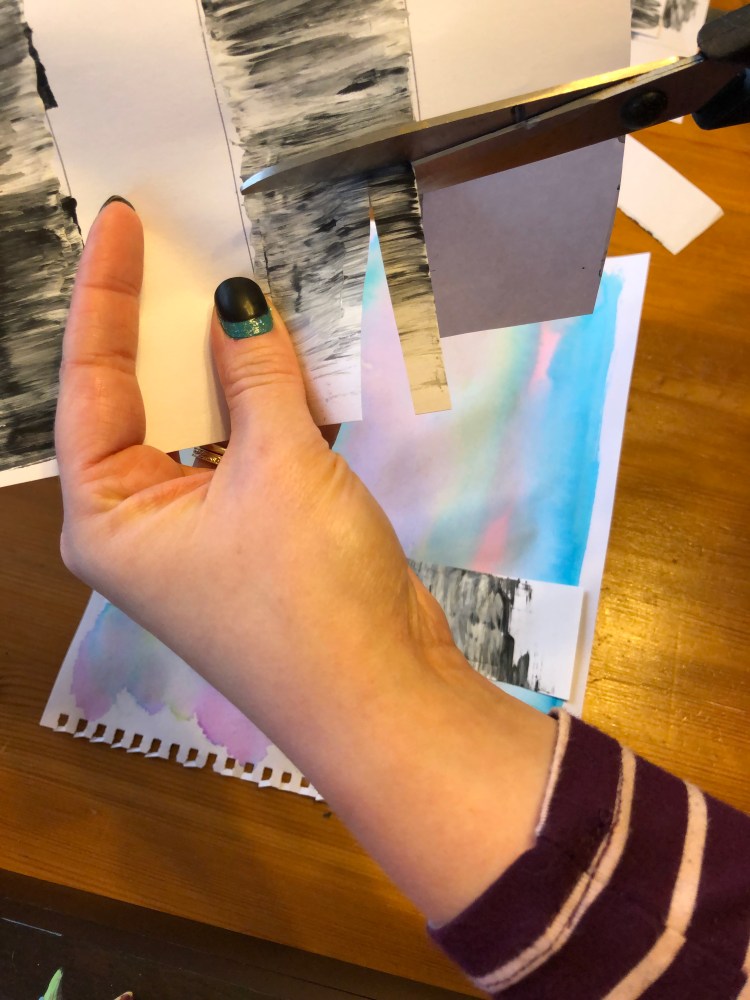
Take your cut out trees and glue them on to your background. Place them however you’d like, leaving space in between so you can see the background and so that you can add branches if you want.
Step Five: Finishing Touches
Ta da! You’re all done. If you want to add more details, you could add some birds, leaves or any other details that you’d like.

If you want to turn this into a science project for younger grades, you could have your young artist research what birch trees look like in different seasons, and add the necessary details to show the differences between each.
If you use paper out of an artist’s pad you can trim the edges as a finishing touch. You can also put your creation in a frame, or glue it on to a larger piece of coloured paper for a nice finishing touch.
If you have any questions, don’t hesitate to reach out. Thanks for following along, and have fun creating!
